Showing posts with label Visual Effects. Show all posts

Thursday, January 15, 2009

VFX Tip #3 - Compositing Fog or Mist

Compositing fog elements seems like a pretty straightforward thing to do in After Effects. Shoot or render your fog element against black, and then Add or Screen it on top of your footage, right? Wrong. This method is incorrect. Let's go over why.

The Add transfer mode should only be used when compositing light passes, or something that is made up of light, such as fire, lasers, or lens flares. However, fog, as we know, is not made up of light, but rather tiny particles of moisture suspended in the air. They may reflect, refract, and diffuse light, but they do not emit it. Therefore, we must not composite fog elements with Add or Screen because it is an incorrect representation of real life. This holds true of smoke elements as well.

On a simple compositing level, fog elements should occlude their background plate, not Add to it. The following is a technique I use for compositing fog elements into background plates using After Effects. This method can apply to other compositing programs as well, so if you use Shake, Combustion, Nuke, Fusion, or other such program, please continue to read on.

First, let's look at our original background plate...

Click To Enlarge

As you can see, this image provides a good reference for a starting point to add more fog. Notice how the fog completely obsures the top of the bridge tower. The fog is not see through as an Add operation would be. Now, let's take a look at our fog element...

Click To Enlarge

I purchased this fog element from http://www.detfilmshd.com/, which is a great resource for low cost elements that composite nicely into VFX shots. I highly recommend them. If you do not have a filmed element of fog, Fractal Noise or Turbulent Noise can be used as a decent substitute.

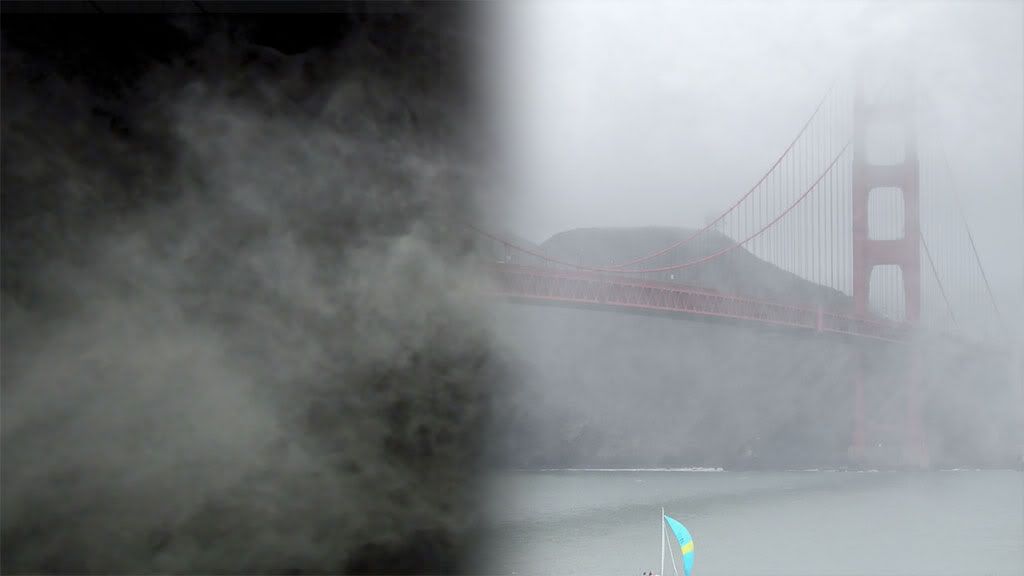
Now, we can't just put this element over the background plate using Add, because we get this result...
Click To Enlarge

That doesn't look very natural when we compare it with our original plate. It's blowing out the bridge details and the sky, because it seems to be adding light. This is not what we are going for. Remember, we want occlusion, not addition.

A better alternative, is to create a new soild layer, and use the color eyedropper tool to select an appropriate gray color to use for our fog. I generally try to use a color near the horizon.
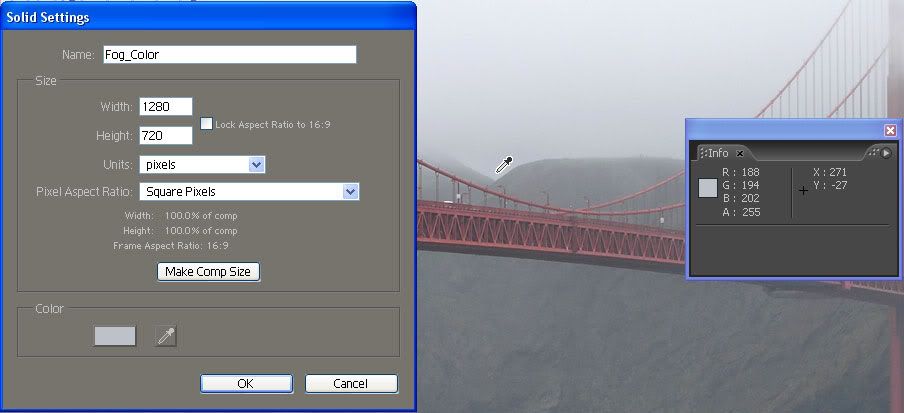
Click To Enlarge

Now all we have to do, is use the fog footage's luminance as a mask on the new gray solid we just created. To do this, simply layer the fog element footage over the solid, and set the solid's track matte to "Luma Matte." That's all their is to it. Your composite will now look much more natural.
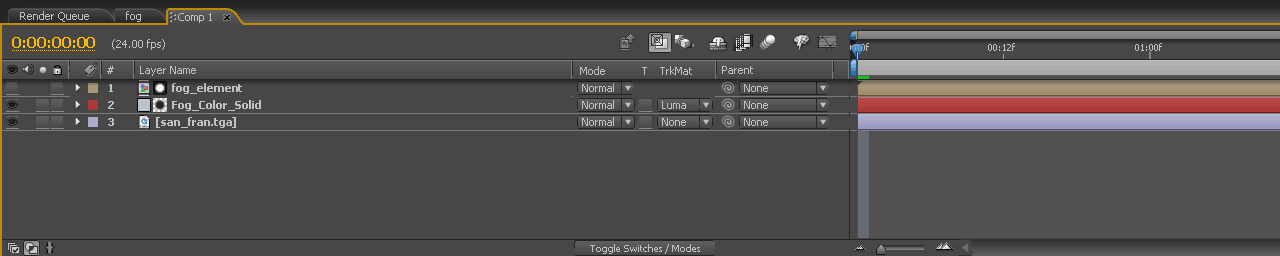
Click To Enlarge

Finally, we can add one more last touch to this composite. Select your background plate layer (in this case, the bridge) and add a Compound Blur. This will look strange at first, so we need to make a couple of adjustments. Set to Blur layer in the Compound Blur controls menu to be the fog footage element. This will use the fog element's luminance as a mask for blurring the background plate. This simulates the way fog in the real world diffracts light behind it. The blur by default, though, will be 20, which is too high for fog, so set it to be around 0.5-1.0.
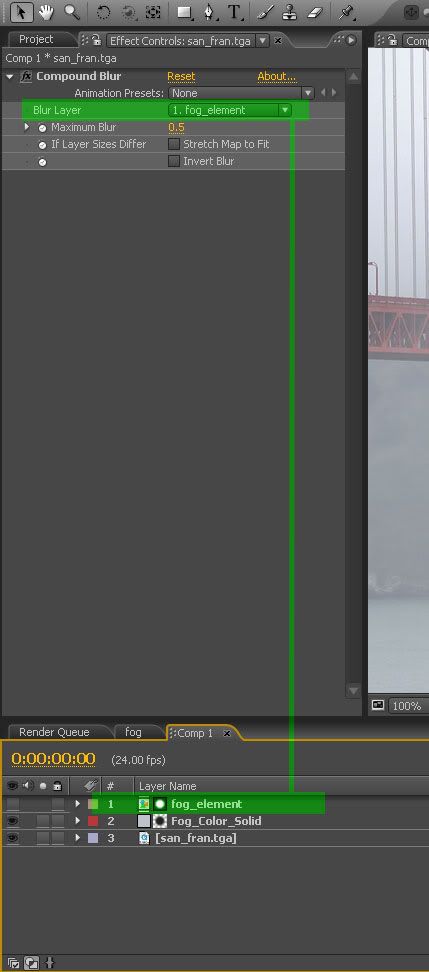
Click To Enlarge

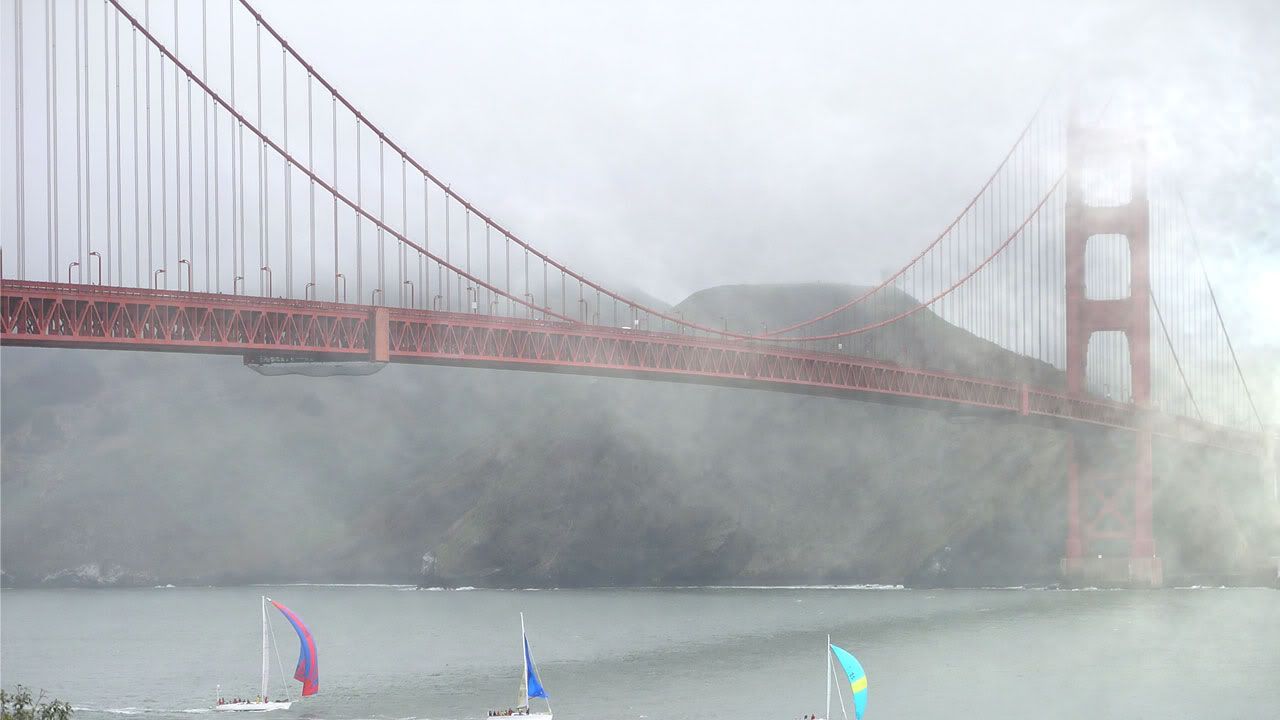
A little extra work than using transfer modes to be sure, but it will greatly help the realism of your shots. And here is our finished composite...

Click To Enlarge

Tuesday, December 16, 2008

Car Shader Tests

So, this is my first attempt at doing a photorealisitc studio car rendering. I used mental ray for 3ds max for this image. The car is using shaders from the Arch & Design materials, as well as a Car Paint material build with mental ray.

A little post work, such as film grain and softening, and I think it's starting to take on a realistic appearance.

Click to view full resolution image


Click to view full resolution image


Monday, July 14, 2008

OpenEXR


I'm very late jumping onto the bandwagon of OpenEXR, or the .EXR format for images. My recent conversion to a completely linear workflow has coaxed me into making the jump. I must say however, that I wish I had been using EXR ever since it came out to the public.

For those of you who don't know, EXR is a image format written at Industrial Light and Magic for storing scanned film images or renders. It is a very sophisticated format, allowing you many options for compression, bit depths, and the ability to store high dynamic range values.

I won't go into all the technical information, but just a couple of suggestions I learned.


1.When storing a render without film grain , compress using ZIP lossless compression.

2. When storing a scanned film frame, or digital video with noise, compress using PIZ lossless compression.


For more techinical details on EXR, see these two sites...

http://www.openexr.com/

http://en.wikipedia.org/wiki/Openexr


The main reason for me posting this entry is this: USE EXR, IT ROCKS.

Saturday, July 5, 2008

Essential Reading For Every Visual Effects Artist

I have been meaning to write a new VFX tip for weeks now, but I haven't gotten around to it yet. Life's been busy...or I've been lazy, I don't know which. Perhaps a little of both, skewing toward lazy.

However, while this is not a VFX tip or tutorial of my own, I hope it is helpful nonetheless. I learned CG by spending hours at the local Barnes and Noble reading books on graphics and visual effects. Today, there is a wealth of knowledge and reference out there regarding these subjects. Here is a list of three books, that are at the top of my list of essential reading for visual effects artists.

This is my favorite book of all time. Never before I have seen so much information about visual effects crammed into one book. None of the material is wasteful, and it includes great tips on compositing, along with explainations on why photographed elements look the way they do. While this book is specifically for Adobe After Effects, the information can be used across almost any compositing package, as it also includes general theory along with detailed examples of how to perform the effects in After Effects. Pick this book up.

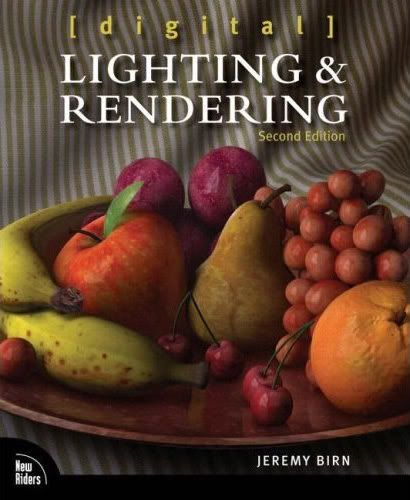
2.Digital Lighting and Rendering (2nd Edition) by Jeremy Birn

I know I said number one was my favorite book of all time, but I think this book has to be tied. It's fantastic, but in a different way. While AE Studio Techniques covers a wide array of compositing techniques, this book covers 3D lighting, texturing, and compositing. The first edition of this book almost single handedly taught me how to light CG shots. When I was a visual effects noob way back in 2000-2001, I spent many weekends at my local Barnes & Noble reading that book. The second edition is the latest one, and it covers everything from old school techniques, to the newest of lighting and compositing. This is the best book on CG lighting that has ever been written, period.


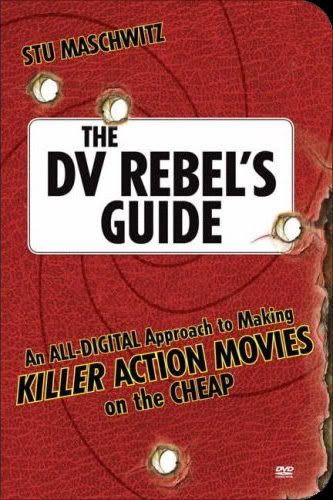
I included this book in the list because not only is it clever, informative, and well written, it's just plain fun. This book excited me the first time I thumbed through it. Stu explains ways to get big budget looks on a not so big budget. He covers almost all aspects of filmmaking from your first script idea all the way to the finished product. There is a chapter on effects, which even covers miniatures, along with digital effects. The information in this book is fantastic. Pick it up, and be on your way to shooting a low budget action flick.

Monday, June 16, 2008

Stan Winston Passes Away


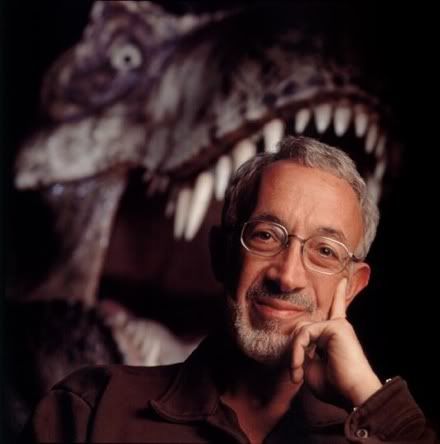
It is with great sadness I make this post. Legendary make up and creature effects artist Stan Winston has passed away at age 62. He was one of Hollywood's top talent. Throughout his career, he won three Academy Awards. His loss is a great one to the effects industry, and to Hollywood as a whole.

Some of you might not know his name, but you most certainly know his work. He and his team of talented artist brought us the likes of the Terminator, the Jurassic Park dinosaurs, Alien, Predator, and many more. His most recent work was creating the practical suit for Iron Man.

His death hits kind of close to home for me, because I am an aspiring effects artist. Even though I aspire to be a CG artist, and not a physical effects artist as Stan was, he is still an inspiration to me. His animatronic work on Jurassic Park, along with ILM's CG effects, is what inspired me originally to want to be an effects artist.

So next time you watch one of the classic movies he worked on, remember all the hard work and genius behind the effects that he and his team created. A truly talented man, and a great loss to be sure.

Saturday, May 10, 2008

CG Water Splashes

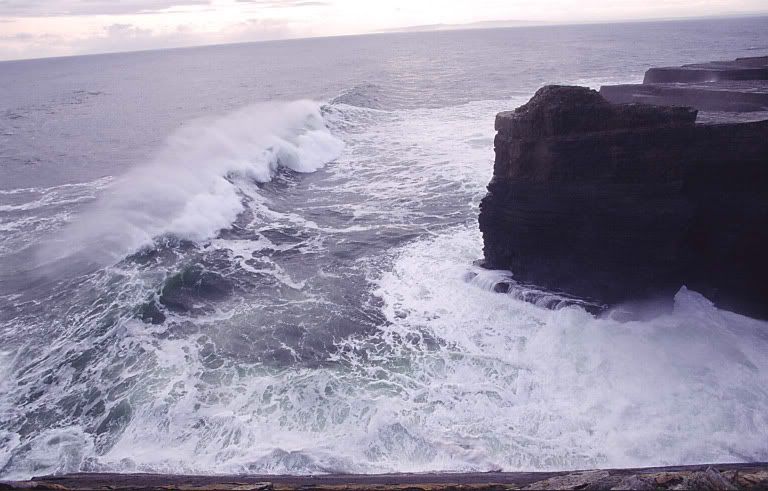
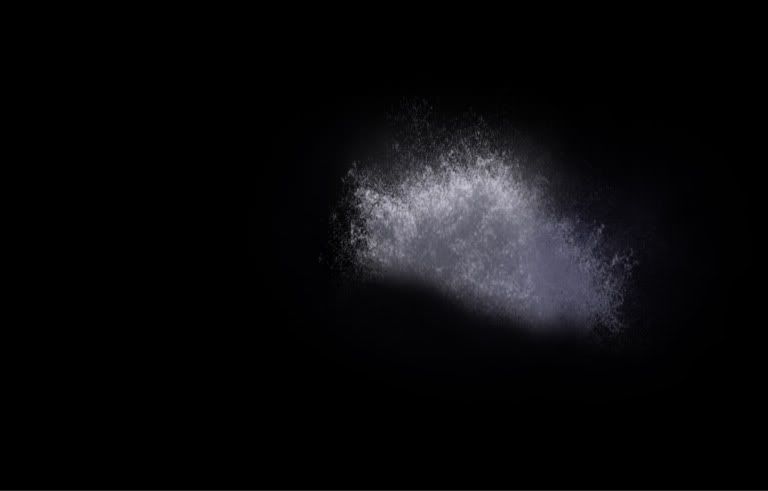
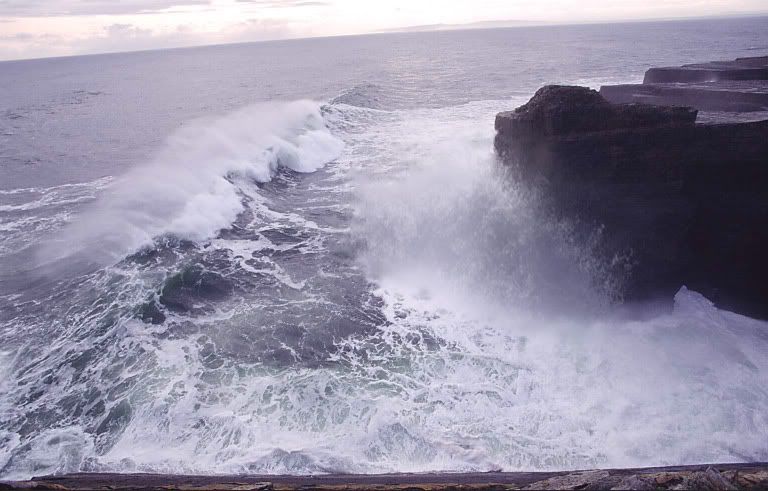
This afternoon I played around with creating large scale CG water splashes using compositing tricks. The results are below...

Background Plate
Click To Enlarge
CG Splash Element
Click To Enlarge
Final Composite
Click To Enlarge

For a more in depth rundown of how I created this effect, head over to the CGTalk Particle Flow Discussion Thread

As a side note, today is my 3rd wedding anniversary to my wonderful wife Sarah. I love her very much, and I look forward to the many more years we will spend together.


Friday, May 2, 2008

VFX Tip #2 - Lightwrap: Less is More

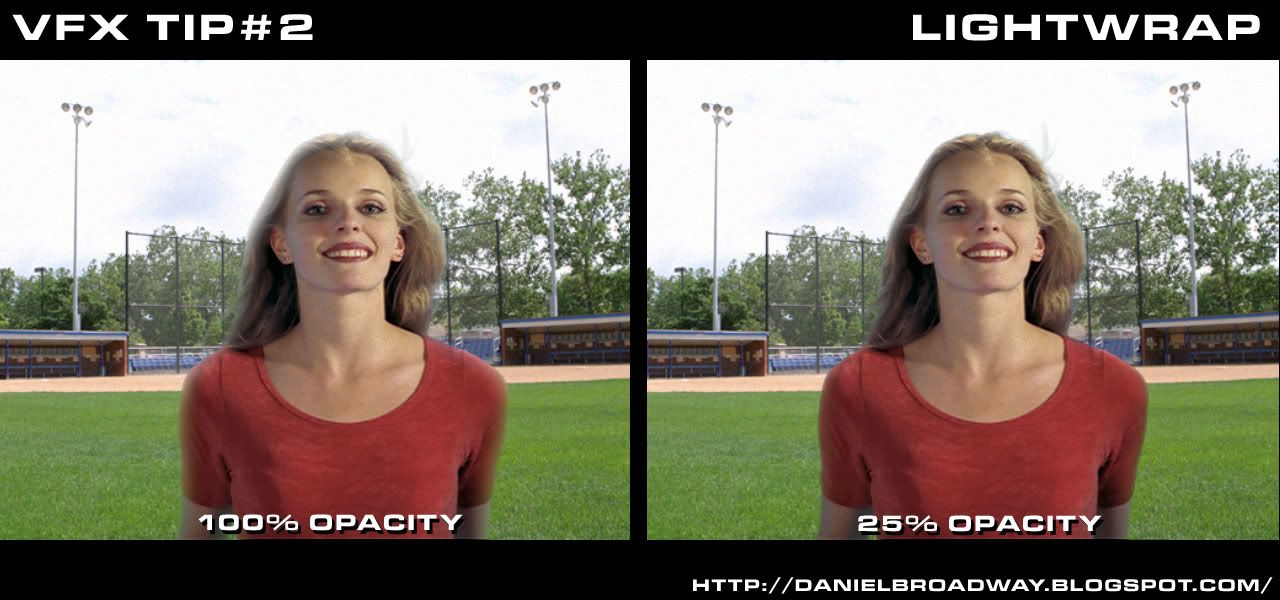
Light wrapping is a useful technique for making a blue/greenscreen subject or CG object really set in the background it is being composited into. It creates the illusion of the light from the background plate appear to bleed over the foreground, which helps the element blend naturally with its background.

However, this technique should be used subtly. A common mistake I see often in composites is using too much lightwrap. If you just leave the lightwrap effects at 100% opacity, most of the time, it will be too much. In fact, I try not to go above about 50% opacity. Look at the example below to see what I mean.

Click to Enlarge

Clearly, the default 100% is far too much lightwrap, which looks unnatural, and gives away the composite. However, on the right, the lightwrap is only at 25% and feels far more natural.

Monday, April 7, 2008

VFX Tip #1 - Hunk Of Burning Love

No, I'm not the hunk of burning love. However, you may love me after this easy tip. In addition, you'll most certainly love the power of blending fire elements using 1.0 gamma.

This is the first of what I hope to be a continued series of visual effects tips. Sometimes they will be quick tips, and sometimes a bit more involved.

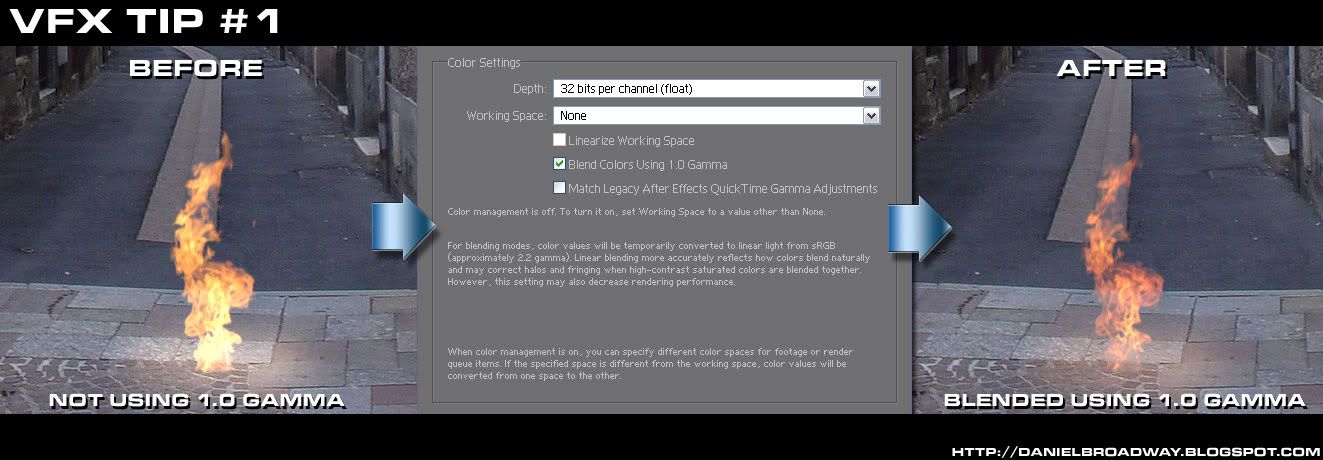
For my first tip, I thought I would share the benefits of compositing using a gamma blending of 1.0 in Adobe After Effects. Without going into a detailed explanation, blending with a gamma of 1.0 allows a more natural looking blend of light inside of a composite. This is especially true of elements shot against black such as fire or explosions.

In After Effects, you can enable 1.0 gamma blending by going to File>Project Settings and put a check mark next to "Blend Colors Using 1.0 Gamma." Below is an image example. All settings are identical, except for the gamma blending change. Both fire elements are composited using the "Add" transfer mode.


Click to Enlarge

Notice how the fire on the left is quite blown out, and has lost much of it's orange color, which was in the original plate. After enabling blending, you can see on the right that it sets in the in the image much nicer, and looks far more natural. Well, as natural as burning stone can look, anyway. There is also a noticeable difference in the cast lighting that I faked on the ground under the fire.

Also keep in mind, that this can also be useful for energy effects, such as sparks, lightning, lasers, or even lightsaber blades.

I hope this little tip was helpful. Stay tuned for more.

Friday, January 11, 2008

Star Trek Fan Trailer Mistaken for "Star Trek" Real Teaser


Anyone who knows me, knows I'm a big fan of Star Trek. Well, I wanted to brush up on my CG skills, so I decided to make a Star Trek fan teaser trailer, based on the new Star Trek movie being made by J.J. Abrams. I had the simple idea to have a fly though of the the solar system, and then revel the new Enterprise under construction. Something that only took about a week of working on it on and off.


Anyway, I mostly finished my fan teaser late Wednesday night. So, after helping me with encoding tests, "someone", who will remain nameless, decided it would be funny to put my teaser trailer on YouTube and tout it as the real "leaked" Star Trek teaser. The real teaser for Star Trek will be attached in front of Cloverfield which comes out on January 18th, so the timing of this "leak" was actually quite clever.

Anyway, when I woke up, I was informed what had happened and went to Trekmovie.com site, which I visit daily. At this point, my fan trailer had spread all over the Star Trek fan sites, and was believed by many to be the genuine teaser trailer due out next week. Trekmovie had already debunked the trailer as being a fake, and through IP tracking, had discovered it had come from my IP address, and since I post their regularly, under my real name, I was called out on my "deception."

I immediately posted a comment on the article at Trekmovie to explain that I was the creator of the fan trailer, and to confirm that it was indeed not the real trailer. Even so, people all over the internet not as informed, have mistaken it for the real teaser trailer. It's been featured on many star trek fan sites, Ain't It Cool News, Slashfilm, and YouTube. At the time of this writing, the YouTube video has been viewed 48,705 times in about 36 hours.


So anyway, it's been a crazy day and a half on the internet for me. But also kind of fun. I just want to say thanks to all the fans who have complimented me on my fan teaser, and I hope you enjoyed it.

The fan trailer I created, can be seen below...


If you want to see a higher quality version of it, you can "Right Click and Save As" below...

Star Trek Fan Teaser Trailer


Tuesday, December 4, 2007

Visual Effects for "Like Moles, Like Rats" Completed


Today I composited the final visual effects shot for Like Moles, Like Rats. I have completed 60 effects shots for the film over the course of about a year and a half.

I began work on the film as visual effects supervisor in June of 2006. This is the first feature length film I have ever worked on, and it's been a great experience. Sure, there were very stressful times too, but I have learned so much about filmmaking, and also about creating ever more complex visual effects shots.

I'm truly glad I had this experience to learn new VFX techniques. And the director, Jim Torres, is a great guy to work with, and also a good friend. He's probably had more patience with me than I deserved, heh.

The reason I say that, is that the premiere of the movie for cast and crew is on Friday, and I'm turning in the last visual effects shot on Thursday morning. I like to cut it close, to keep Jim on the edge of his seat, biting his finger nails.

I would also like to especially thank Tom Miller, an online buddy of mine, who lent a hand as an Effects Technical Director. He created some beautiful computer simulations of oil fires, smoke, nuclear bombs, and S.O.S. flares. His work is fantastic, and he is truly talented at particles and fluid simulations. Tom, thanks for your hard work, buddy.

Also, I want to thank Kristian Andi Lemmik, who created some wonderful, and very detailed 3D virtual environments for the most complex visual effects shot in the film. He did great work, and his work allowed me to fly a camera down a fully CG street, and still see rich detail. Thanks for your hard work as well, Kristian.

Speaking, of environments, my father-in-law, Dick Shook, allowed me to use several CG models of buildings he had made, to detail a virtual city environment. A very big thanks to him for use of his buildings.

I also should thank my best friend, Jonathan, and also my wife Sarah, for spending many hours by my side, keeping me company while I slaved away on shots.

It's been a wild ride, and I am very excited to see my work for the first time on a movie screen on Friday night.

As for future projects, Jim and I will be working to complete my short SciFi film, Invasion, which was put on hold to work on Likes Moles, Like Rats.

I am also assisting Tom as compositing supervisor for a space battle sequence in a Star Wars fanfilm called Star Wars: Threads of Destiny.