This is the first of what I hope to be a continued series of visual effects tips. Sometimes they will be quick tips, and sometimes a bit more involved.
For my first tip, I thought I would share the benefits of compositing using a gamma blending of 1.0 in Adobe After Effects. Without going into a detailed explanation, blending with a gamma of 1.0 allows a more natural looking blend of light inside of a composite. This is especially true of elements shot against black such as fire or explosions.
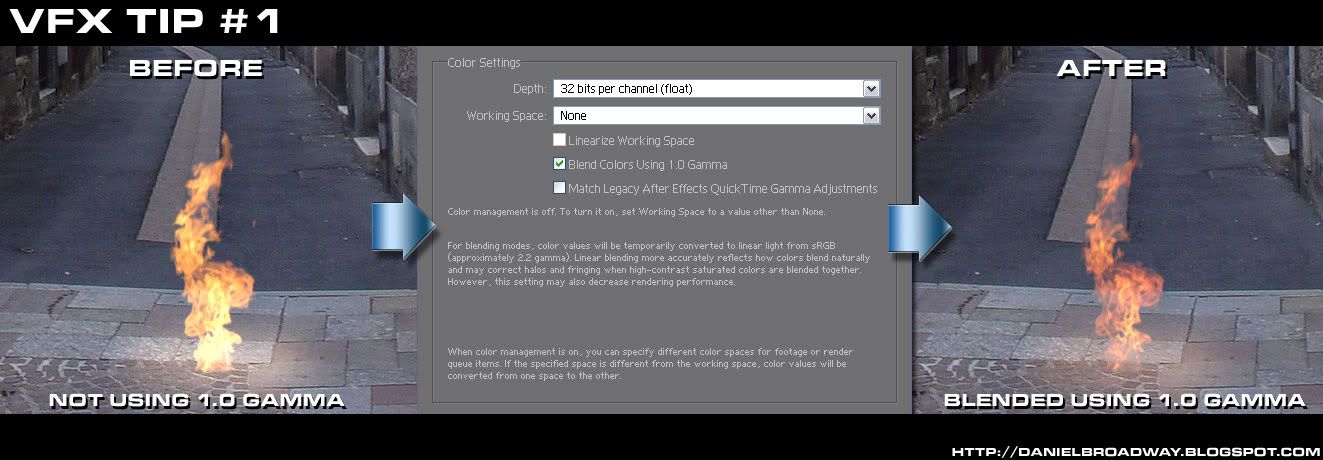
In After Effects, you can enable 1.0 gamma blending by going to File>Project Settings and put a check mark next to "Blend Colors Using 1.0 Gamma." Below is an image example. All settings are identical, except for the gamma blending change. Both fire elements are composited using the "Add" transfer mode.
 Click to Enlarge
Notice how the fire on the left is quite blown out, and has lost much of it's orange color, which was in the original plate. After enabling blending, you can see on the right that it sets in the in the image much nicer, and looks far more natural. Well, as natural as burning stone can look, anyway. There is also a noticeable difference in the cast lighting that I faked on the ground under the fire.
Also keep in mind, that this can also be useful for energy effects, such as sparks, lightning, lasers, or even lightsaber blades.
I hope this little tip was helpful. Stay tuned for more.
3 comments:
Cool.
Looks great.
thanks! I'd like to know what does gamma 1 blending actually means (to be applied in other compositors)
cheers!
Post a Comment