This is the personal blog of Daniel Broadway. Occasionally, I will post personal blogs, but for the most part, this will be dedicated to my explorations in computer graphics and visual effects.
Hey folks. AeTutsPlus has hosted my newest video tutorial "Understanding Linear Workflow". This is a subject that is confusing to many people, and I hope this tutorial will help to clear up some of the misunderstandings. Head over and check it out!
I know it's been a long time since I've updated my blog, but my life has been crazy busy with freelance work, normal work, and other such things. Free time is scarce.
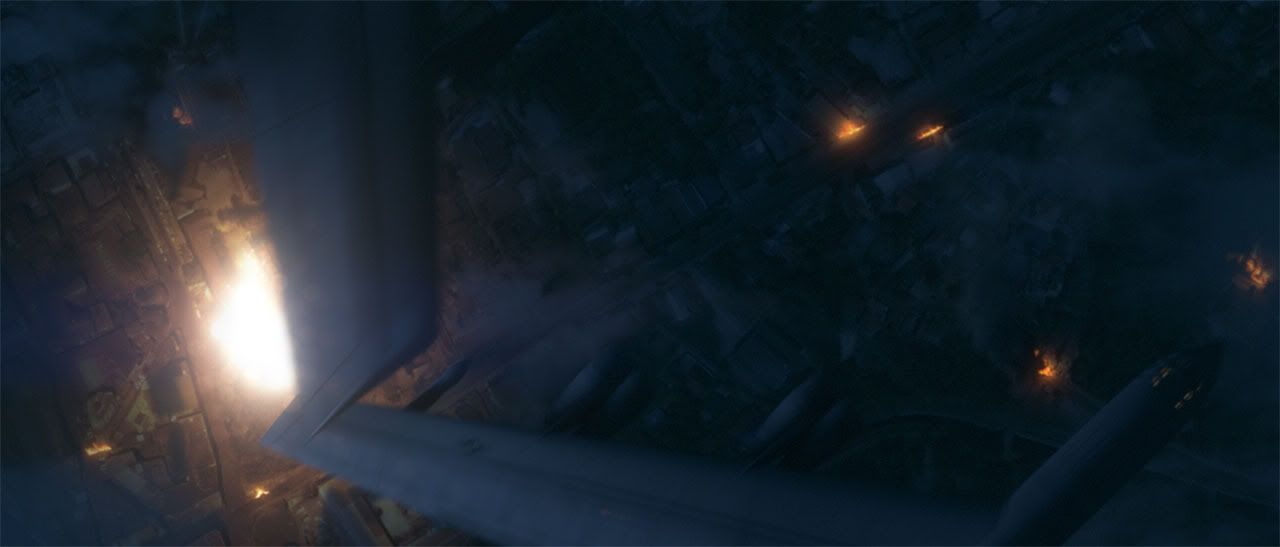
My current freelance work is as a visual effects artist (along with some supervising) on a new independent film called "A Lonely Place For Dying." The opening shot of the film is actually a fully CG shot composited and featuring CGI B-52s by myself, and featuring CG explosions from my good buddy, Tom Miller.
Here is a little sneak peak at that shot...
Click to view larger
When I get some free time, I'll be writing new tips and tutorials, so stay tuned.
A year or so ago, after watching the first teaser trailer for J.J. Abrams' Star Trek, I was excited about the reinvigoration of the of the Star Trek franchise.
Being a CG artist, I am also always looking for ways to practice and increase my skills. I thought, "What if I was in charge of reinvigorating Star Trek?" What would my first teaser trailer look like?
So, I decided to find out. During my down time, I began to work on CG assets, some loaned to me by very generous and talented CG artists from across the web. Below, I present a look at the creation of the VFX in this fan created Star Trek: The Beginning Teaser Trailer.
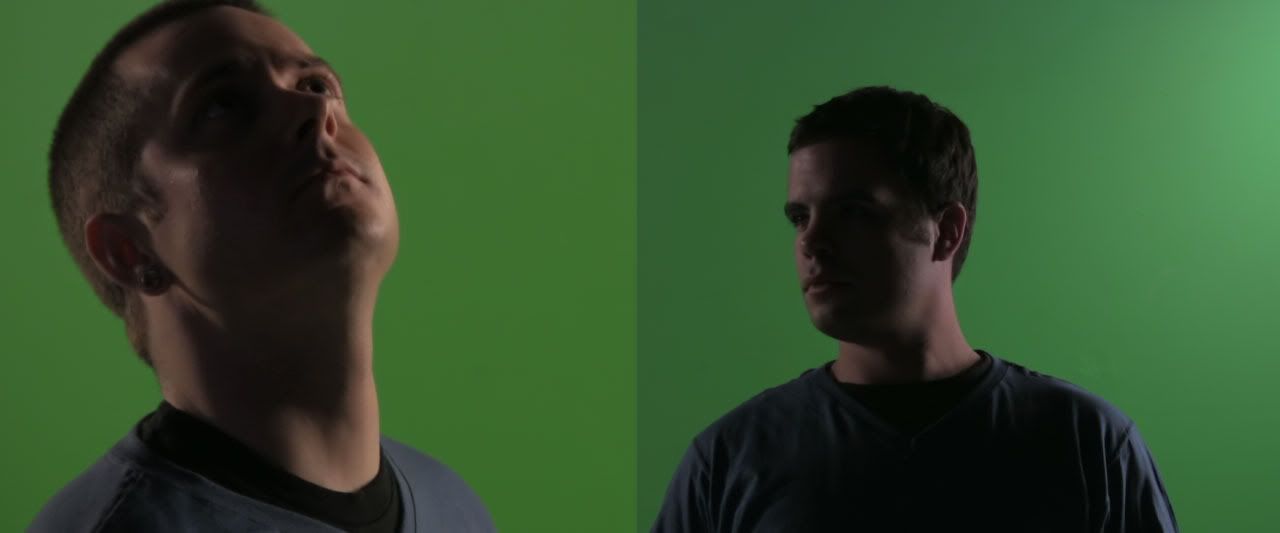
In the first shot, we see two starfleet officers riding a turbolift up a launch tower, similar to one you would see at Cape Canaveral in Florida. This shot is a combination of CGI and of live action plates. The two actors scene in it are actually two of my coworkers. They were shot on a green chroma key wall where I work at separate times.
Click To Enlarge
The background turbolift and launch tower are fully CG creations. The far background of the San Francisco skyline is a stock photo acquired from www.sxc.hu, an excellent free stock photography site. As a matter of fact, all San Francisco skylines featured were aquired from there.
Click To Enlarge
The next shot, we see some metal doors opening to reveal a gantry hallway leading up to a launching pad. Like the previous shot, both of my coworkers were shot on greenscreen, and placed into a fully CG shot. The only other real element is the steam coming out of the end of the gantry to the left, and that was aquired at www.detonationfilms.com
The shot after that, we see the newly designed Enterprise sitting in the shipyard in San Francisco Bay. This shot is fully CG except for the background skyline and some of the steam elements, again, from Detonation Films.
Next, we see a shot of the Enterprise's secondary hull, which has not yet been attached to the primary hull, undergoing some zero-g plate welding. This shot is once again fully digital except for the earth in the background which is a NASA image obtained at spaceflight.nasa.gov.
This next shot should be interesting to some Trekkies. It depects the saucer being launched from San Francisco Bay into space. For this, I wanted to evoke a very NASA like feel to the launch, complete with smoking billows to each side. However, I could not create a convicning scale and look with CG volumetric smoke. Instead, I choose to use images I found of huge volcanic pyroclastic flows, cut out the smoke, rotate into position, and animate their billowing using After Effect's Mesh Warp tool. This is a techinique I learned from Mark Christiansen'sAdobe After Effects CS4 Visual Effects and Compositing Studio Techinques. Whew, that's a mouthful.
Click To Enlarge
Also, the water in the still shot was perfectly still, so I replaced the water in the bay with CG water so that the water would have movement.
Original Plate Click To Enlarge
CG Water Click To Enlarge
Next up is the teaser reveal of the Enterprise from the rear in drydock, while in orbit around Earth. For this shot, I used the wonderful CG models of Dan Uyeno (Enterprise/Drydock) and Rafael Dominguez Estrada (Galileo 7 shuttlecraft). Again, the Earth is an image from NASA composited into this otherwise fully digital shot.
Of particular interest to me personally in this shot, is the digital recreation of the anamorphic lens flare seen in this shot. It is made of highly custom compositing operations using luma matte tricks and various other filters such as Knoll Light Factory.
Anamorphic Lens Flare Click To Enlarge
The final shot in the trailer is the reveal of the Enterprise fully from the front, and its subsequent jump to warp. This shot is simple, but also offered room to learn about new techniques. One thing I did, was create a 2D matte painting of Jupiter in Photoshop using a Cassini image as base. The streaking light of the ship during the warp jump were achieved using Mental Ray and 32-bit rendering that allowed me to create of the overbrights required for this effect.
Enteprise leaving the Solar System (Jupiter and moons in background) Click To Enlarge
Well, that's a quick rundown of the shots. I hope this has been informative. If you have any questions, feel free to e-mail me. The link is in the upper right hand corner of my blog. You can also watch this trailer below, but please go to YouTube and click the HD button to watch it in it's HD glory.
Compositing fog elements seems like a pretty straightforward thing to do in After Effects. Shoot or render your fog element against black, and then Add or Screen it on top of your footage, right? Wrong. This method is incorrect. Let's go over why.
The Add transfer mode should only be used when compositing light passes, or something that is made up of light, such as fire, lasers, or lens flares. However, fog, as we know, is not made up of light, but rather tiny particles of moisture suspended in the air. They may reflect, refract, and diffuse light, but they do not emit it. Therefore, we must not composite fog elements with Add or Screen because it is an incorrect representation of real life. This holds true of smoke elements as well.
On a simple compositing level, fog elements should occlude their background plate, not Add to it. The following is a technique I use for compositing fog elements into background plates using After Effects. This method can apply to other compositing programs as well, so if you use Shake, Combustion, Nuke, Fusion, or other such program, please continue to read on.
First, let's look at our original background plate...
Click To Enlarge
As you can see, this image provides a good reference for a starting point to add more fog. Notice how the fog completely obsures the top of the bridge tower. The fog is not see through as an Add operation would be. Now, let's take a look at our fog element...
Click To Enlarge
I purchased this fog element from http://www.detfilmshd.com/, which is a great resource for low cost elements that composite nicely into VFX shots. I highly recommend them. If you do not have a filmed element of fog, Fractal Noise or Turbulent Noise can be used as a decent substitute.
Now, we can't just put this element over the background plate using Add, because we get this result...
Click To Enlarge
That doesn't look very natural when we compare it with our original plate. It's blowing out the bridge details and the sky, because it seems to be adding light. This is not what we are going for. Remember, we want occlusion, not addition.
A better alternative, is to create a new soild layer, and use the color eyedropper tool to select an appropriate gray color to use for our fog. I generally try to use a color near the horizon.
Click To Enlarge
Now all we have to do, is use the fog footage's luminance as a mask on the new gray solid we just created. To do this, simply layer the fog element footage over the solid, and set the solid's track matte to "Luma Matte." That's all their is to it. Your composite will now look much more natural.
Click To Enlarge
Finally, we can add one more last touch to this composite. Select your background plate layer (in this case, the bridge) and add a Compound Blur. This will look strange at first, so we need to make a couple of adjustments. Set to Blur layer in the Compound Blur controls menu to be the fog footage element. This will use the fog element's luminance as a mask for blurring the background plate. This simulates the way fog in the real world diffracts light behind it. The blur by default, though, will be 20, which is too high for fog, so set it to be around 0.5-1.0.
Click To Enlarge
A little extra work than using transfer modes to be sure, but it will greatly help the realism of your shots. And here is our finished composite...


 Click to view larger
 Click To Enlarge
 Click To Enlarge
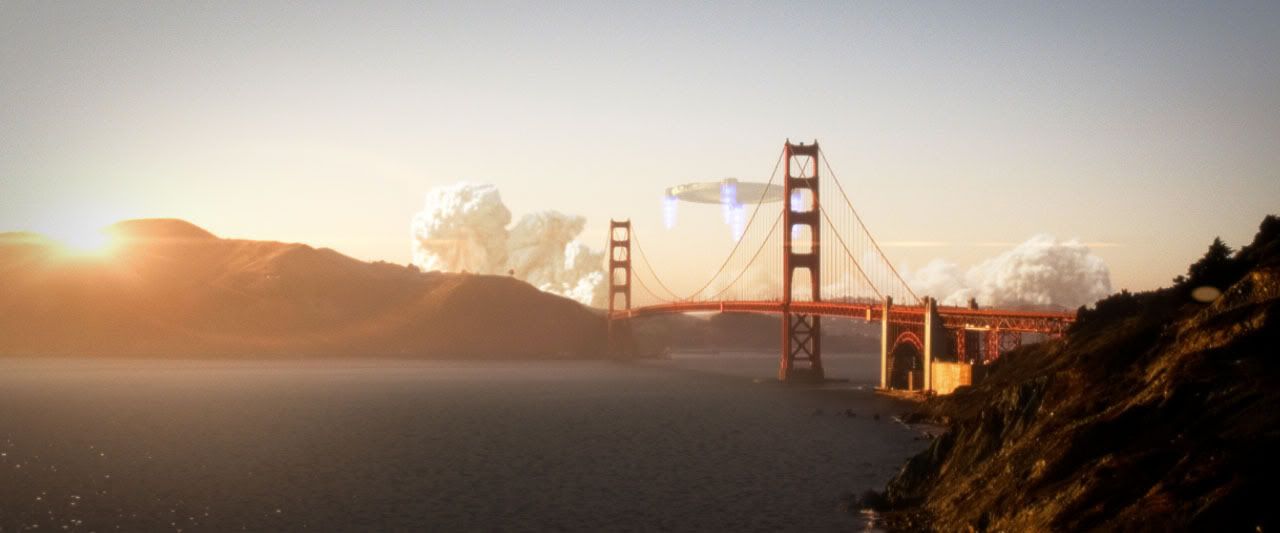 Click To Enlarge
 Original Plate
 CG Water
 Anamorphic Lens Flare
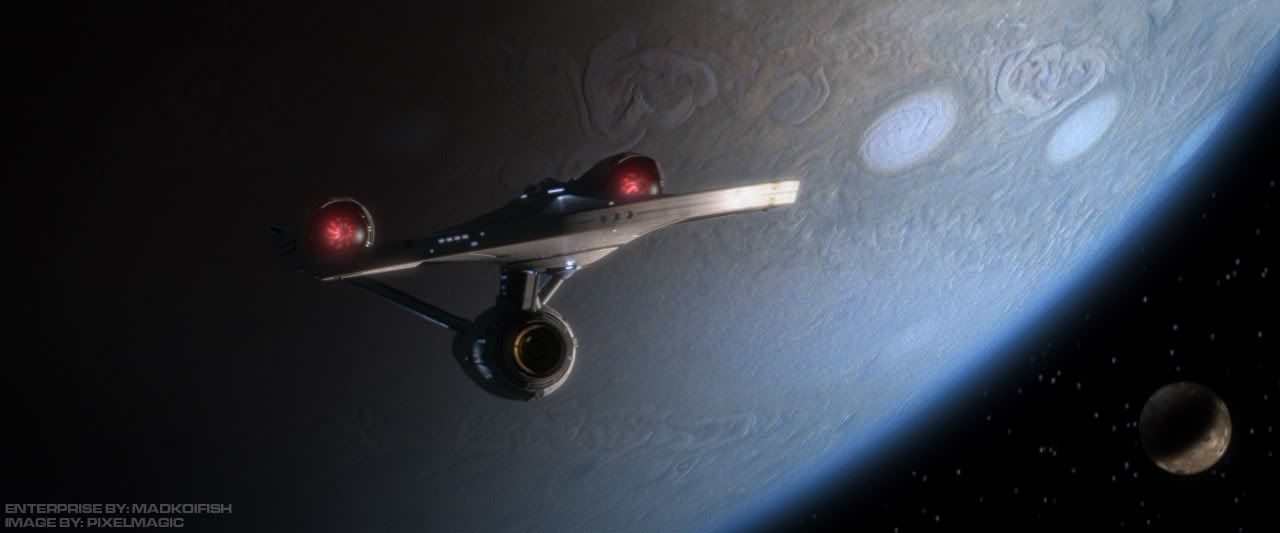 Enteprise leaving the Solar System (Jupiter and moons in background)
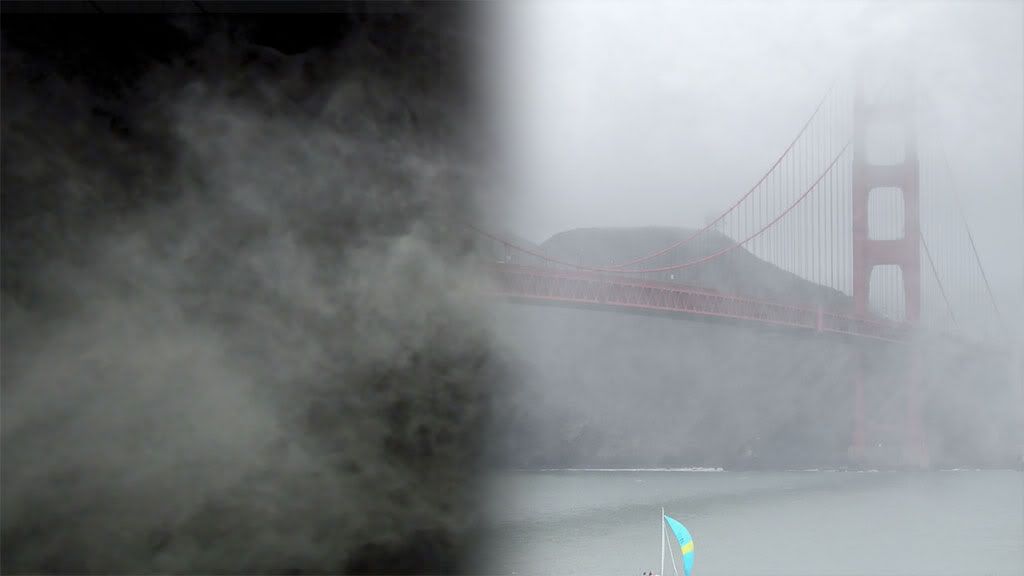 Compositing fog elements seems like a pretty straightforward thing to do in After Effects. Shoot or render your fog element against black, and then Add or Screen it on top of your footage, right? Wrong. This method is incorrect. Let's go over why.
 Click To Enlarge
 Click To Enlarge
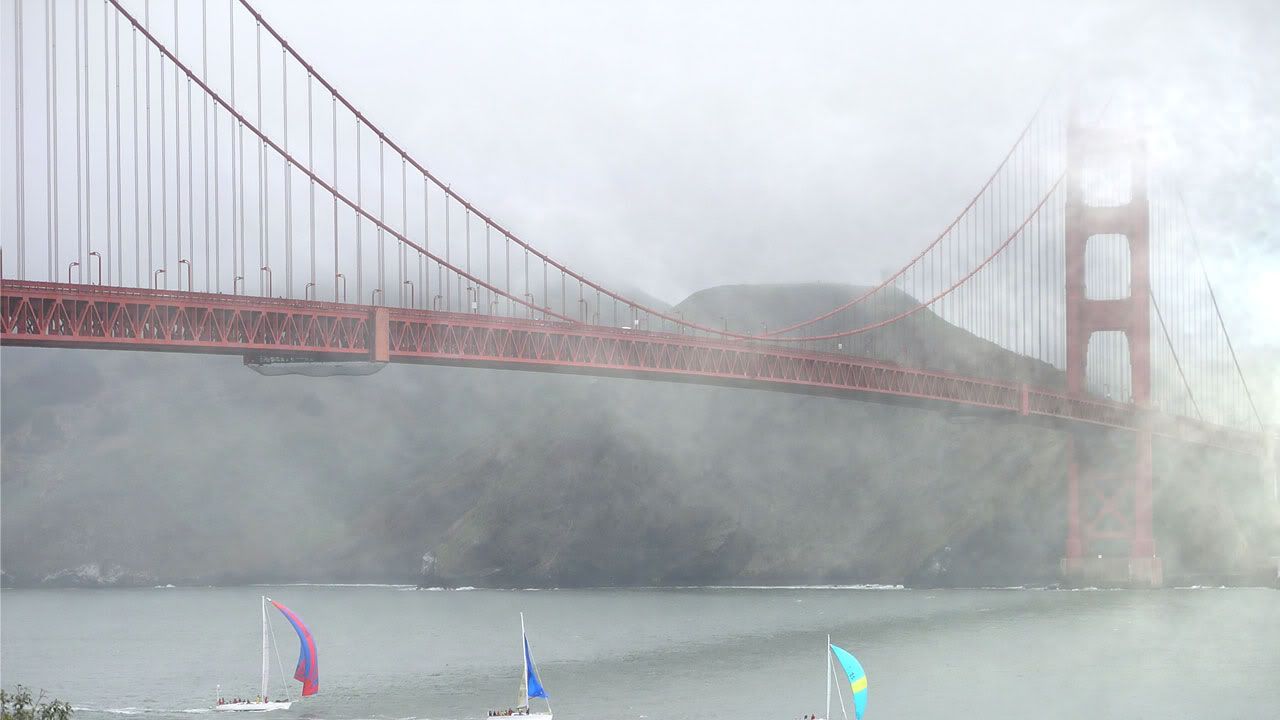 Click To Enlarge
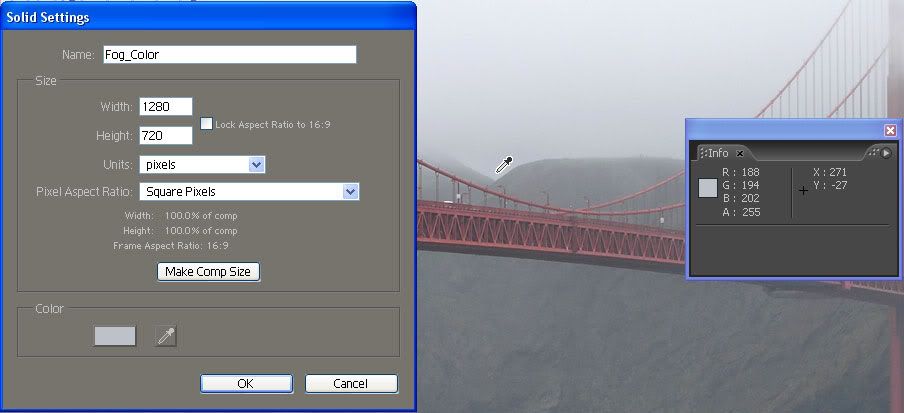 Click To Enlarge
 Click To Enlarge
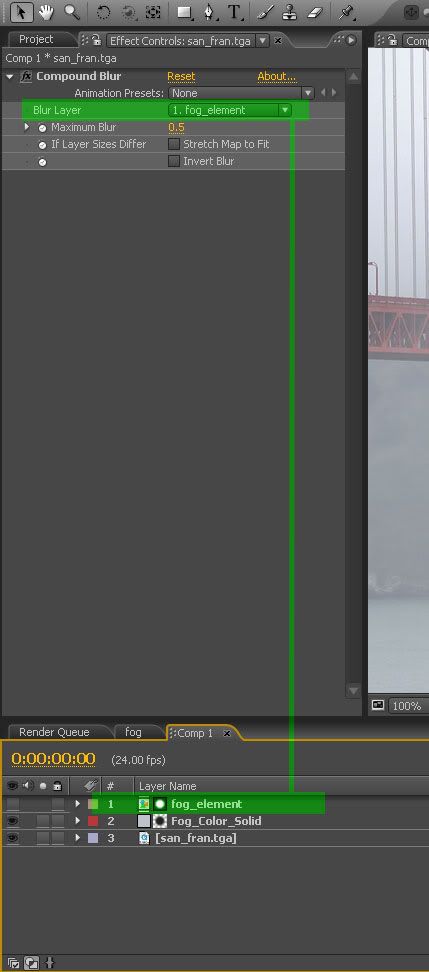 Click To Enlarge
 Click To Enlarge