Compositing fog elements seems like a pretty straightforward thing to do in After Effects. Shoot or render your fog element against black, and then Add or Screen it on top of your footage, right? Wrong. This method is incorrect. Let's go over why.
The Add transfer mode should only be used when compositing light passes, or something that is made up of light, such as fire, lasers, or lens flares. However, fog, as we know, is not made up of light, but rather tiny particles of moisture suspended in the air. They may reflect, refract, and diffuse light, but they do not emit it. Therefore, we must not composite fog elements with Add or Screen because it is an incorrect representation of real life. This holds true of smoke elements as well.
On a simple compositing level, fog elements should
occlude their background plate, not Add to it. The following is a technique I use for compositing fog elements into background plates using After Effects. This method can apply to other compositing programs as well, so if you use Shake, Combustion, Nuke, Fusion, or other such program, please continue to read on.
First, let's look at our original background plate...
 Click To Enlarge
As you can see, this image provides a good reference for a starting point to add more fog. Notice how the fog completely obsures the top of the bridge tower. The fog is not see through as an Add operation would be. Now, let's take a look at our fog element...
 Click To Enlarge
I purchased this fog element from
http://www.detfilmshd.com/, which is a great resource for low cost elements that composite nicely into VFX shots. I highly recommend them. If you do not have a filmed element of fog, Fractal Noise or Turbulent Noise can be used as a decent substitute.
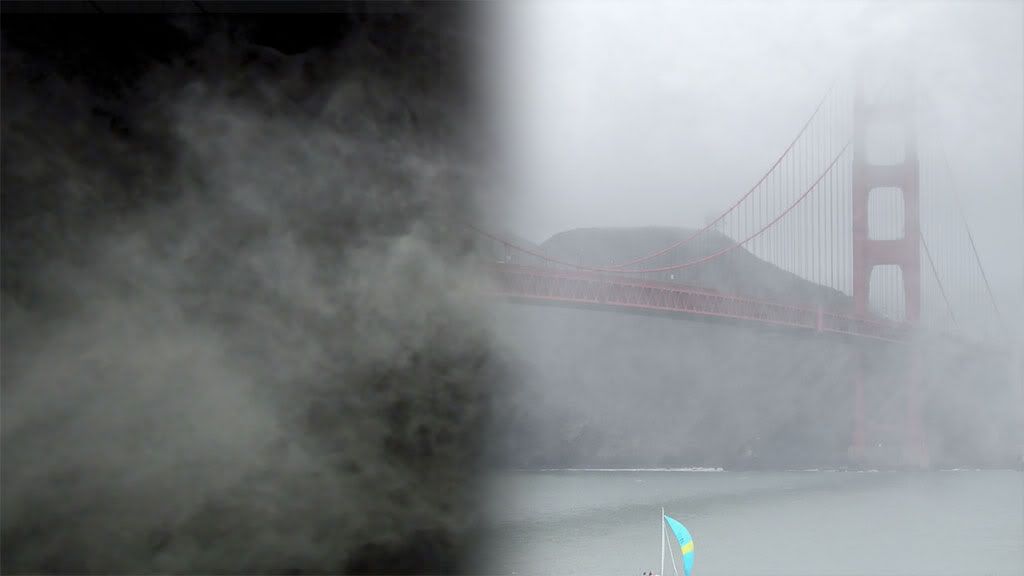
Now, we can't just put this element over the background plate using Add, because we get this result...
 Click To Enlarge
That doesn't look very natural when we compare it with our original plate. It's blowing out the bridge details and the sky, because it seems to be adding light. This is not what we are going for. Remember, we want occlusion, not addition.
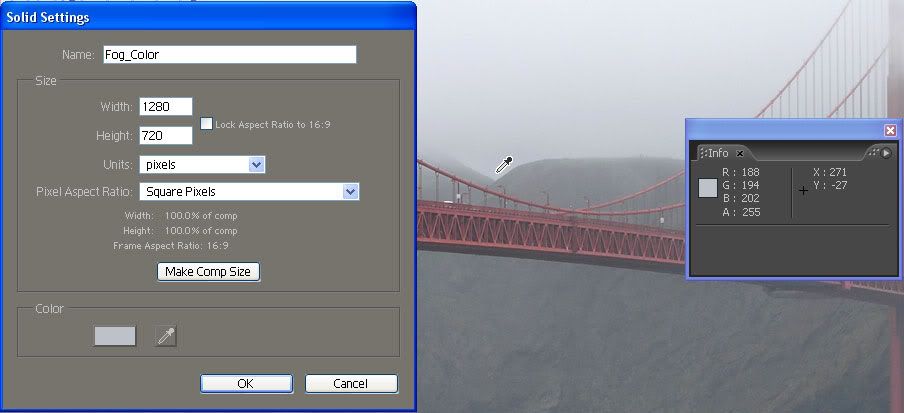
A better alternative, is to create a new soild layer, and use the color eyedropper tool to select an appropriate gray color to use for our fog. I generally try to use a color near the horizon.
 Click To Enlarge
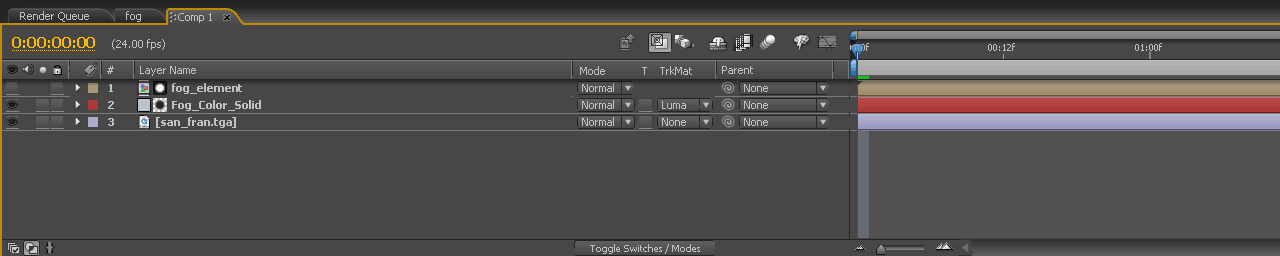
Now all we have to do, is use the fog footage's luminance as a mask on the new gray solid we just created. To do this, simply layer the fog element footage over the solid, and set the solid's track matte to "Luma Matte." That's all their is to it. Your composite will now look much more natural.
 Click To Enlarge
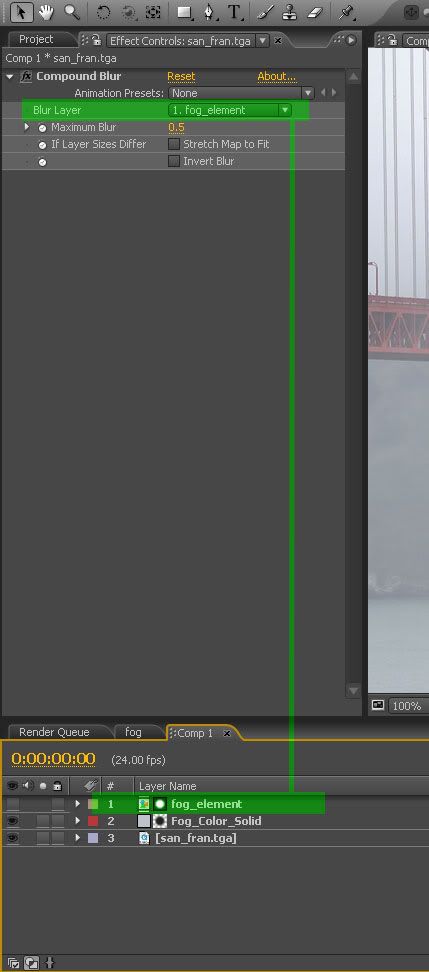
Finally, we can add one more last touch to this composite. Select your background plate layer (in this case, the bridge) and add a Compound Blur. This will look strange at first, so we need to make a couple of adjustments. Set to Blur layer in the Compound Blur controls menu to be the fog footage element. This will use the fog element's luminance as a mask for blurring the background plate. This simulates the way fog in the real world
diffracts light behind it. The blur by default, though, will be 20, which is too high for fog, so set it to be around 0.5-1.0.
 Click To Enlarge
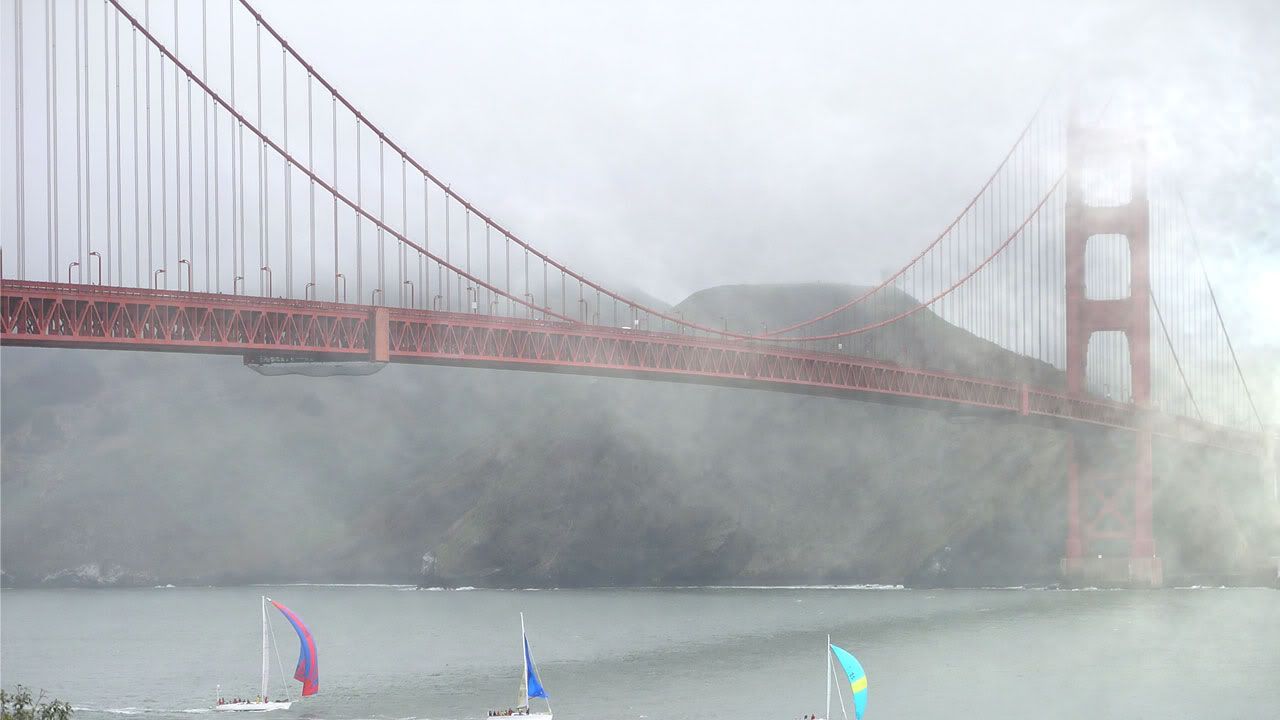
A little extra work than using transfer modes to be sure, but it will greatly help the realism of your shots. And here is our finished composite...
 Click To Enlarge
 Alright, it's been about 5 years since I've participated in a FXWARS! challenge, and I just had to be a part of this one. I'm doing the Race to the Future/Clock Tower in "Back To The Future". My home town square is strikingly similar to the Hill Valley Clock Tower and Square, so I figured I'd use that for background plates to place my CG DeLorean.